Создание змейки на HTML5 Canvas
HTML5 Canvas позволяет создавать 2D приложения любой сложности. Удобство этой технологии заключается в её кроссплатформенности, ибо любое устройство, где есть современный браузер, может запустить подобное приложение.
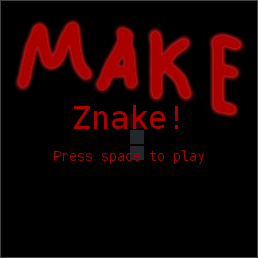
В этой статье я покажу как создать игру-змейку, на примере своей реализации этой игры.
Подготовка🔗︎
Для начала создадим файловую структуру проекта, в моём случае она выглядит таким образом:
├── client
│   ├── app.js
│   ├── apple.js
│   ├── game.js
│   ├── input.js
│   └── snake.js
├── index.html
├── LICENSE
└── README.m
Информация о файлах:
- В
README.mdнаходится небольшое описание проекта, вLICENSE- текст MIT лицензии. - В
index.htmlнаходится HTML код, который подключает все файлы с JavaScript кодом. - В каталоге
client/находится клиентская часть исполняемого кода, в моей игре нет серверной части, но я всё же решил назвать каталог соответствующим образом. client/app.js- файл приложения, в этом файле находится цикл игры и здесь же она запускается.client/input.js- небольшая библиотека для более удобного определения нажатой клавиши.client/game.js- файл игры, в этом файле объединяются все части игры, создаётся Canvas, обновляются и перерисовываются данные.client/apple.js- файл яблока, здесь находятся функции для создания, удаления и рендеринга яблока.client/snake.js- файл змейки, отвечает за передвижение и увеличение змейки.
index.html🔗︎
Здесь всё просто, обычный HTML код с подключением всех JavaScript файлов.
<!DOCTYPE html>
<html>

<head>
	<title>Znake!</title>
	<meta charset="utf-8">
</head>

<body style="margin: 0px; padding: 0px; background: #000;">
	<script type="text/javascript" src="client/input.js"></script>
	<script type="text/javascript" src="client/snake.js"></script>
	<script type="text/javascript" src="client/apple.js"></script>
	<script type="text/javascript" src="client/game.js"></script>
	<script type="text/javascript" src="client/app.js"></script>
</body>

</html>
client/app.js - приложение🔗︎
Файл приложения - это файл, в котором инициализируется приложение и запускается бесконечный таймер.
Инициализация🔗︎
Код инициализации приложения выглядит следующим образом:
var game = new Game();

// app init function
function init() {
	game.init();
	setInterval(main, 1000 / 6);
}
Здесь мы инициализируем объект Game и создаём функцию init(), в которой запускается метод game.init() и запускается бесконечный таймер.
Бесконечный таймер🔗︎
Функция main() - это функция которая будет вызываться постоянно, выглядит она следующим образом:
// main game loop
function main() {
	game.update();
	game.render();
};
Здесь мы вызываем методы игры - метод обновления, а потом метод для рендеринга.
Обработка клавиш🔗︎
Добавляем обработчик события keydown, который будет вызывать метод game.handleInput(e);
document.addEventListener('keydown', function(e) {
	game.handleInput(e);
});
Запуск🔗︎
Здесь всё просто - в самом конце мы вызываем функцию init(), что повлечёт за собой запуск всего приложения.
// on ready
init();
Итог🔗︎
Полный код client/app.js выглядит так:
/*

	Znake!

	Snake game with HTML5

*/

var game = new Game();

// app init function
function init() {
	game.init();
	setInterval(main, 1000 / 6);
}

// main game loop
function main() {
	game.update();
	game.render();
};

document.addEventListener('keydown', function(e) {
	game.handleInput(e);
});

// on ready
init();
client/input.js - определение нажатой клавиши🔗︎
Эта маленькая библиотека была создана для удобного определения нажатых клавиш.
Функция isKey(key) проверяет наличие key в объекте keys, чтобы заменить слово на код клавиши и если его там нет, то считается, что была введена какая-то буква. Потом полученный код сравнивается с введённым.
Для удобства здесь создаётся метод объекта window - input, который позволяет использовать библиотеку следующим образом: input.isKey('SPACE').
(function() {
	var keys = {
		SHIFT: 16,
		CTRL: 17,
		SPACE: 32,
		LEFT: 37,
		UP: 38,
		RIGHT: 39,
		DOWN: 40
	};

	function isKey(key) {
		var code;
		if (typeof keys[key] !== 'undefined') {
			code = keys[key];
		} else {
			code = key.charCodeAt(0);
		}
		return (event.keyCode == code);
	}

	window.input = {
		isKey: function(key) {
			return isKey(key.toUpperCase());
		},
		isLock: false
	};
})();
client/game.js - тело игры🔗︎
В этом файле объединяются все части игры, создаётся Canvas, обновляются и перерисовываются данные.
Объект Game создаётся следующим образом:
function Game() {
	// default settings
	this.cellSize = 16;
	this.canvasWidth = 256;
	this.canvasHeight = 256;
	this.backgroundColor = '#000';
	this.snakeColor = '#789';
	this.snakeHeadColor = '#aa0000';
	this.score = 0;
	this.status = 1;
	this.STATUS = {
		PLAY: 0,
		NONE: 1,
		GAMEOVER: 2,
		GAMEWIN: 3,
		PAUSE: 4
	};

	// centring
	document.body.style.textAlign = 'center';

	// create canvas
	this.canvas = document.createElement('canvas');
	document.body.appendChild(this.canvas);

	this.canvas.width = this.canvasWidth;
	this.canvas.height = this.canvasHeight;
	this.canvas.style.border = '1px solid #444';

	// context
	this.context = this.canvas.getContext('2d');

	// scene
	this.sceneWidth = Math.ceil(this.canvasWidth / this.cellSize);
	this.sceneHeight = Math.ceil(this.canvasHeight / this.cellSize);

	// load snake
	this.snake = new Snake(this);

	// load apple
	this.apple = new Apple(this);
}
В блоке // default settings определяются параметры игры по умолчанию, создаются константы, которые будут использовать остальные файлы.
Далее мы создаём объект Canvas стандартными методами Javascript и располагаем его по центру страницы. Настраиваем его ширину и высоту, задаём стиль рамке.
Потом, на основе параметров высоты, ширины и размера ячейки мы высчитываем количество ячеек на поле в ширину и высоту.
И в самом конце мы подключаем объекты Snake и Apple, чтобы использовать их в методах объекта Game.
Сброс игры🔗︎
Функция сброса игры нужна для её первоначальной инициализации и сброса игры, если игрок пожелает сыграть заново.
Функция reset выглядит таким образом:
Game.prototype.reset = function() {
	this.snake = new Snake(this);
	this.apple = new Apple(this);

	// zeroing variables
	this.score = 0;
}
Здесь мы заново инициализируем объекты Snake и Apple для сброса их значений в Game и обнуляем переменную this.score.
Инициализация игры🔗︎
Приложение должно запускать функцию инициализации, поэтому объявим её:
Game.prototype.init = function() {
	this.reset();
}
Обновление данных🔗︎
Суть обновления данных в объекте Game заключается в объединении всех методов.
Данные в игре постоянно обновляются, поэтому необходимо написать функцию update, которая будет вызываться в приложении постоянно:
Game.prototype.update = function() {
	if (this.getStatus() == this.STATUS.PLAY) {
		this.snake.update();
	}
	input.isLock = false;
}
Здесь мы проверяем статус игры и обновляем данные змейки, если игра идёт. Также мы отключаем блокировку клавиатуры.
Рендеринг🔗︎
Суть рендеринга в объекте Game заключается в объединении всех методов рендера.
Game.prototype.render = function() {
	// clear scene
	this.context.fillStyle = this.backgroundColor;
	this.context.fillRect(0, 0, this.canvasWidth, this.canvasHeight);

	// render dynamic
	this.snake.render();
	this.apple.render();

	switch (this.getStatus()) {
		// playing
		case this.STATUS.PLAY:
			break;

		// none
		case this.STATUS.NONE:
			this.showMsg('Znake!', 'Press space to play');
			break;

		// game over
		case this.STATUS.GAMEOVER:
			this.showMsg('Game Over', 'Press space to play', 'Score: ' + this.score);
			break;

		// game win
		case this.STATUS.GAMEWIN:
			this.showMsg('You Win!', 'Press space to play', 'Score: ' + this.score);
			break;

		// pause
		case this.STATUS.PAUSE:
			this.showMsg('Pause', 'Press space to continue');
			break;
	}
}
Здесь мы очищаем сцену, подключаем методы рендера яблока и змейки и проверям статус игры, для вывода сообщения, если оно требуется.
Сообщения🔗︎
Чтобы пользователю сообщать какую-то информацию нужно изобрести диалог.
Для удобства сообщения какой-либо информацию напишем метод showMsg:
Game.prototype.showMsg = function(header, action, addition) {
	// background
	this.context.beginPath();
	this.context.fillStyle = 'rgba(0, 0, 0, 0.7)';
	this.context.fillRect(0, 0, this.canvasWidth, this.canvasHeight);
	this.context.closePath();

	// top text
	this.context.beginPath();
	this.context.font = "normal normal 32px monospace";
	this.context.fillStyle = '#aa0000';
	this.context.textAlign = "center";
	this.context.fillText(header, this.canvasWidth / 2, this.canvasHeight / 2);
	this.context.closePath();

	// middle text
	this.context.beginPath();
	this.context.font = "normal normal 14px monospace";
	this.context.fillStyle = '#aa0000';
	this.context.textAlign = "center";
	this.context.fillText(action, this.canvasWidth / 2, this.canvasHeight / 2 + 32);
	this.context.closePath();

	// bottom addition text
	if (addition !== undefined) {
		this.context.beginPath();
		this.context.font = "normal normal 14px monospace";
		this.context.fillStyle = '#aa0000';
		this.context.textAlign = "center";
		this.context.fillText(addition, this.canvasWidth / 2, this.canvasHeight - 32);
		this.context.closePath();
	}
}
Статус игры🔗︎
В каждой игре есть статус: идёт игра, игра закончена проигрышем, игра закончена выигрышем и так далее. Поэтому напишем несколько небольших функций для более удобной работы со статусом.
/*

	Game status

*/

Game.prototype.setStatus = function(value) {
	this.onStatusChange(value, this.status);
	this.status = value;
}

Game.prototype.getStatus = function() {
	return this.status;
}

Game.prototype.onStatusChange = function(newstatus, oldstatus) {
	if (newstatus == this.STATUS.PLAY && oldstatus != this.STATUS.PAUSE) {
		this.apple.create();
	}
}
Обработчик нажатий клавиш🔗︎
В методе handleInput мы должны проверять все нажатые клавиши и выполнять функции, которые они должны выполнять.
/*

	Key's

*/

Game.prototype.handleInput = function(event) {
	if (input.isKey('SPACE')) {
		if (this.getStatus() == this.STATUS.GAMEOVER || this.getStatus() == this.STATUS.GAMEWIN) {
			this.reset();
			this.setStatus(this.STATUS.PLAY);
		} else if (this.getStatus() == this.STATUS.PAUSE) {
			this.setStatus(this.STATUS.PLAY);
		} else if (this.getStatus() == this.STATUS.PLAY) {
			this.setStatus(this.STATUS.PAUSE);
		} else if (this.getStatus() == this.STATUS.NONE) {
			this.setStatus(this.STATUS.PLAY);
		}
	}

	if (this.getStatus() == this.STATUS.PLAY && !input.isLock) {
		input.isLock = true;

		if ((input.isKey('UP') || input.isKey('w')) && !this.snake.isRoute('DOWN')) {
			this.snake.setRoute('UP');
		} else if ((input.isKey('DOWN') || input.isKey('s')) && !this.snake.isRoute('UP')) {
			this.snake.setRoute('DOWN');
		} else if ((input.isKey('LEFT') || input.isKey('a')) && !this.snake.isRoute('RIGHT')) {
			this.snake.setRoute('LEFT');
		} else if ((input.isKey('RIGHT') || input.isKey('d')) && !this.snake.isRoute('LEFT')) {
			this.snake.setRoute('RIGHT');
		}
	}
}
Здесь определяем несколько клавиш для взаимодействия, и определяем вызываемые ими функции. Также мы блокируем клавиатуру до следующего обновления данных. Это поможет предотвратить непредсказуемое поведение змейки.
Итог🔗︎
Полный код client/game.js выглядит так:
function Game() {
	// default settings
	this.cellSize = 16;
	this.canvasWidth = 256;
	this.canvasHeight = 256;
	this.backgroundColor = '#000';
	this.snakeColor = '#789';
	this.snakeHeadColor = '#aa0000';
	this.score = 0;
	this.status = 1;
	this.STATUS = {
		PLAY: 0,
		NONE: 1,
		GAMEOVER: 2,
		GAMEWIN: 3,
		PAUSE: 4
	};

	// centring
	document.body.style.textAlign = 'center';

	// create canvas
	this.canvas = document.createElement('canvas');
	document.body.appendChild(this.canvas);

	this.canvas.width = this.canvasWidth;
	this.canvas.height = this.canvasHeight;
	this.canvas.style.border = '1px solid #444';

	// context
	this.context = this.canvas.getContext('2d');

	// scene
	this.sceneWidth = Math.ceil(this.canvasWidth / this.cellSize);
	this.sceneHeight = Math.ceil(this.canvasHeight / this.cellSize);

	// load snake
	this.snake = new Snake(this);

	// load apple
	this.apple = new Apple(this);
}

Game.prototype.init = function() {
	this.reset();
}

Game.prototype.update = function() {
	if (this.getStatus() == this.STATUS.PLAY) {
		this.snake.update();
	}
	input.isLock = false;
}

Game.prototype.reset = function() {
	this.snake = new Snake(this);
	this.apple = new Apple(this);

	// zeroing variables
	this.score = 0;
}

Game.prototype.render = function() {
	// clear scene
	this.context.fillStyle = this.backgroundColor;
	this.context.fillRect(0, 0, this.canvasWidth, this.canvasHeight);

	// render dynamic
	this.snake.render();
	this.apple.render();

	switch (this.getStatus()) {
		// playing
		case this.STATUS.PLAY:
			break;

		// none
		case this.STATUS.NONE:
			this.showMsg('Znake!', 'Press space to play');
			break;

		// game over
		case this.STATUS.GAMEOVER:
			this.showMsg('Game Over', 'Press space to play', 'Score: ' + this.score);
			break;

		// game win
		case this.STATUS.GAMEWIN:
			this.showMsg('You Win!', 'Press space to play', 'Score: ' + this.score);
			break;

		// pause
		case this.STATUS.PAUSE:
			this.showMsg('Pause', 'Press space to continue');
			break;
	}
}

/*

	Game message

*/

Game.prototype.showMsg = function(header, action, addition) {
	// background
	this.context.beginPath();
	this.context.fillStyle = 'rgba(0, 0, 0, 0.7)';
	this.context.fillRect(0, 0, this.canvasWidth, this.canvasHeight);
	this.context.closePath();

	// top text
	this.context.beginPath();
	this.context.font = "normal normal 32px monospace";
	this.context.fillStyle = '#aa0000';
	this.context.textAlign = "center";
	this.context.fillText(header, this.canvasWidth / 2, this.canvasHeight / 2);
	this.context.closePath();

	// middle text
	this.context.beginPath();
	this.context.font = "normal normal 14px monospace";
	this.context.fillStyle = '#aa0000';
	this.context.textAlign = "center";
	this.context.fillText(action, this.canvasWidth / 2, this.canvasHeight / 2 + 32);
	this.context.closePath();

	// bottom addition text
	if (addition !== undefined) {
		this.context.beginPath();
		this.context.font = "normal normal 14px monospace";
		this.context.fillStyle = '#aa0000';
		this.context.textAlign = "center";
		this.context.fillText(addition, this.canvasWidth / 2, this.canvasHeight - 32);
		this.context.closePath();
	}
}

/*

	Game status

*/

Game.prototype.setStatus = function(value) {
	this.onStatusChange(value, this.status);
	this.status = value;
}

Game.prototype.getStatus = function() {
	return this.status;
}

Game.prototype.onStatusChange = function(newstatus, oldstatus) {
	if (newstatus == this.STATUS.PLAY && oldstatus != this.STATUS.PAUSE) {
		this.apple.create();
	}
}

/*

	Key's

*/

Game.prototype.handleInput = function(event) {
	if (input.isKey('SPACE')) {
		if (this.getStatus() == this.STATUS.GAMEOVER || this.getStatus() == this.STATUS.GAMEWIN) {
			this.reset();
			this.setStatus(this.STATUS.PLAY);
		} else if (this.getStatus() == this.STATUS.PAUSE) {
			this.setStatus(this.STATUS.PLAY);
		} else if (this.getStatus() == this.STATUS.PLAY) {
			this.setStatus(this.STATUS.PAUSE);
		} else if (this.getStatus() == this.STATUS.NONE) {
			this.setStatus(this.STATUS.PLAY);
		}
	}

	if (this.getStatus() == this.STATUS.PLAY && !input.isLock) {
		input.isLock = true;

		if ((input.isKey('UP') || input.isKey('w')) && !this.snake.isRoute('DOWN')) {
			this.snake.setRoute('UP');
		} else if ((input.isKey('DOWN') || input.isKey('s')) && !this.snake.isRoute('UP')) {
			this.snake.setRoute('DOWN');
		} else if ((input.isKey('LEFT') || input.isKey('a')) && !this.snake.isRoute('RIGHT')) {
			this.snake.setRoute('LEFT');
		} else if ((input.isKey('RIGHT') || input.isKey('d')) && !this.snake.isRoute('LEFT')) {
			this.snake.setRoute('RIGHT');
		}
	}
}
client/apple.js - объект яблока🔗︎
В этом файле находится объект яблока и все его методы.
Вначале мы создаём сам объект:
function Apple(game) {
	// get data from game
	this.game = game;

	// apple object
	this.pos = {
		x: -1,
		y: -1
	};
}
В строке this.game = game, мы берём информацию от вышестоящего объекта - game, это нужно для того, чтобы в объекте Apple был доступ ко всей информации игры.
Также мы создаём объект this.pos в котором хранится текущее положение яблока, координаты x: -1, y: -1, означают, что яблока на поле нет.
Удаление яблока🔗︎
Здесь всё просто, присваиваем -1 для текущих координат яблока.
Apple.prototype.remove = function() {
	this.pos.x = -1;
	this.pos.y = -1;
}
Создание яблока🔗︎
Для создания яблока необходимо найти случайные и свободные координаты на поле.
Объявим функцию:
Apple.prototype.create = function() {
Найдём случайные координаты на поле:
var newPos = {
	x: Math.floor(Math.random() * this.game.sceneWidth),
	y: Math.floor(Math.random() * this.game.sceneHeight)
};
Проверим на совпадение новых координат с предыдущими, и если они совпадают, то вызываем функцию создания ещё раз:
if (newPos.x == this.pos.x && newPos.y == this.pos.y) {
	this.create();
	return;
}
Проверим на совпадение новых координат с координатами змейки, и если они совпадают, то вызываем функцию создания ещё раз:
for (var i = 0; i < this.game.snake.getSize(); i++) {
	if (newPos.x == this.game.snake.body[i].x && newPos.y == this.game.snake.body[i].y) {
		this.create();
		return;
	}
}
И, наконец, если новые координаты найдены, то обновляем координаты яблока:
this.pos.x = newPos.x;
this.pos.y = newPos.y;
Полный код функции создания яблока выглядит так:
Apple.prototype.create = function() {
	// set new apple pos
	var newPos = {
		x: Math.floor(Math.random() * this.game.sceneWidth),
		y: Math.floor(Math.random() * this.game.sceneHeight)
	};

	// not on previous pos
	if (newPos.x == this.pos.x && newPos.y == this.pos.y) {
		this.create();
		return;
	}

	// not on snake
	for (var i = 0; i < this.game.snake.getSize(); i++) {
		if (newPos.x == this.game.snake.body[i].x && newPos.y == this.game.snake.body[i].y) {
			this.create();
			return;
		}
	}

	// update
	this.pos.x = newPos.x;
	this.pos.y = newPos.y;
}
Рендеринг яблока🔗︎
Для отрисовки яблока мы используем стандартные canvas методы:
Apple.prototype.render = function() {
	if (this.pos.x != -1 && this.pos.y != -1) {
		this.game.context.beginPath();
		this.game.context.fillStyle = '#00aa00';
		this.game.context.arc(this.pos.x * this.game.cellSize + this.game.cellSize / 2, this.pos.y * this.game.cellSize + this.game.cellSize / 2, this.game.cellSize / 2 - 2, 0, Math.PI * 2);
		this.game.context.fill();
		this.game.context.closePath();
	}
}
Как видно, яблоко будет рисоваться только тогда, когда его координаты не равны -1.
Итог🔗︎
Полный код client/apple.js выглядит так:
function Apple(game) {
	// get data from game
	this.game = game;

	// apple object
	this.pos = {
		x: -1,
		y: -1
	};
}

Apple.prototype.update = function() {

}

Apple.prototype.render = function() {
	if (this.pos.x != -1 && this.pos.y != -1) {
		this.game.context.beginPath();
		this.game.context.fillStyle = '#00aa00';
		this.game.context.arc(this.pos.x * this.game.cellSize + this.game.cellSize / 2, this.pos.y * this.game.cellSize + this.game.cellSize / 2, this.game.cellSize / 2 - 2, 0, Math.PI * 2);
		this.game.context.fill();
		this.game.context.closePath();
	}
}

Apple.prototype.create = function() {
	// set new apple pos
	var newPos = {
		x: Math.floor(Math.random() * this.game.sceneWidth),
		y: Math.floor(Math.random() * this.game.sceneHeight)
	};

	// not on previous pos
	if (newPos.x == this.pos.x && newPos.y == this.pos.y) {
		this.create();
		return;
	}

	// not on snake
	for (var i = 0; i < this.game.snake.getSize(); i++) {
		if (newPos.x == this.game.snake.body[i].x && newPos.y == this.game.snake.body[i].y) {
			this.create();
			return;
		}
	}

	// update
	this.pos.x = newPos.x;
	this.pos.y = newPos.y;
}

Apple.prototype.remove = function() {
	this.pos.x = -1;
	this.pos.y = -1;
}
client/snake.js - объект змейки🔗︎
В этом файле находится объект змейки и все его методы.
Объект Snake создаётся следующим образом:
function Snake(game) {
	// get data from game
	this.game = game;

	// route const
	this.ROUTE = {
		UP: 2,
		DOWN: 0,
		LEFT: 1,
		RIGHT: 3
	};

	// snake body
	var defaultPosX = Math.ceil(this.game.sceneWidth / 2);
	var defaultPosY = Math.ceil(this.game.sceneHeight / 2);

	this.body = [
		{x: defaultPosX, y: defaultPosY - 1},
		{x: defaultPosX, y: defaultPosY},
		{x: defaultPosX, y: defaultPosY + 1}
	];

	// set route
	this.setRoute('UP');
}
В строке this.game = game, мы берём информацию от вышестоящего объекта — game, это нужно для того, чтобы в объекте Snake был доступ ко всей информации игры.
Далее объявляется объект ROUTE, который содержит константы значений, которые определяют направления змейки.
После этого мы определяем середину поля и там создаём змейку размером в 3 части. Каждая часть змейки - это значение массива body.
По умолчанию наша змейка будет двигаться наверх, поэтому задаём ей направление так: this.setRoute('UP').
Увеличение змейки🔗︎
Создадим функцию для добавления элемента к змейке.
Объявим функцию:
Snake.prototype.addElement = function() {
Узнаем номер последнего элемента:
var last_index = this.body.length - 1;
Создадим объект для нового элемента змейки с координатами последнего элемента:
var newSnakeElement = {
	x: this.body[last_index].x,
	y: this.body[last_index].y
};
Теперь определим разницу координат между последним и предпоследним элементом и сместим положение нового элемента:
var x_diff = this.body[last_index].x - this.body[last_index - 1].x;
var y_diff = this.body[last_index].y - this.body[last_index - 1].y;

if (x_diff > 0) {
	newSnakeElement.x += 1;
} else if (x_diff < 0) {
	newSnakeElement.x -= 1;
} else if (y_diff > 0) {
	newSnakeElement.y += 1;
} else if (y_diff < 0) {
	newSnakeElement.y -= 1;
}
Добавим новый элемент в массив змейки:
this.body.push(newSnakeElement);
И если размер змейки равен размеру поля, то возвращаем true, значит игрок выиграл:
if (this.getSize() == this.game.sceneWidth * this.game.sceneHeight) {
	return true;
}

return false;
Полный код функции добавления элемента змейки выглядит следующим образом:
Snake.prototype.addElement = function() {
	// get place to adding
	var last_index = this.body.length - 1;

	var newSnakeElement = {
		x: this.body[last_index].x,
		y: this.body[last_index].y
	};

	var x_diff = this.body[last_index].x - this.body[last_index - 1].x;
	var y_diff = this.body[last_index].y - this.body[last_index - 1].y;

	if (x_diff > 0) {
		newSnakeElement.x += 1;
	} else if (x_diff < 0) {
		newSnakeElement.x -= 1;
	} else if (y_diff > 0) {
		newSnakeElement.y += 1;
	} else if (y_diff < 0) {
		newSnakeElement.y -= 1;
	}

	// push in array
	this.body.push(newSnakeElement);

	// check on win
	if (this.getSize() == this.game.sceneWidth * this.game.sceneHeight) {
		return true;
	}

	return false;
}
Получение размера змейки🔗︎
Чтобы получить размер змейки, достаточно узнать размер массива body:
Snake.prototype.getSize = function() {
	return this.body.length;
}
Изменение направления движения змейки🔗︎
Чтобы изменить направление движения змейки, достаточно изменить значение переменной route:
Snake.prototype.setRoute = function(value) {
	this.route = this.ROUTE[value];
}
Проверка направления движения змейки🔗︎
Проверка направления движения змейки выглядит следующим образом:
Snake.prototype.isRoute = function(value) {
	return this.route == this.ROUTE[value];
}
Обновление змейки🔗︎
Каждый цикл игры мы будем обновлять положение змейки.
Для начала создадим новый элемент и поместим его в голову змейки:
var newSnakeElement = {
	x: this.body[0].x,
	y: this.body[0].y
};
Сместим новый элемент учитывая направление движения змейки:
if (this.isRoute('UP')) {
	newSnakeElement.y -= 1;
} else if (this.isRoute('DOWN')) {
	newSnakeElement.y += 1;
} else if (this.isRoute('LEFT')) {
	newSnakeElement.x -= 1;
} else if (this.isRoute('RIGHT')) {
	newSnakeElement.x += 1;
}
Теперь проверим, находится ли новый элемент на какой-либо другой части змейки:
for (var i = 0; i < this.getSize() - 1; i++) {
	if (newSnakeElement.x == this.body[i].x && newSnakeElement.y == this.body[i].y) {
		this.game.setStatus(this.game.STATUS.GAMEOVER);
		return;
	}
}
А теперь проверим, находится ли новый элемент за пределами поля:
var isOutsideX = newSnakeElement.x < 0 || newSnakeElement.x > this.game.sceneWidth - 1;
var isOutsideY = newSnakeElement.y < 0 || newSnakeElement.y > this.game.sceneHeight - 1;

if (isOutsideX || isOutsideY) {
	this.game.setStatus(this.game.STATUS.GAMEOVER);
	return;
}
Обновим массив змейки, удалим последний элемент и добавим новый элемент в начало:
this.body.pop();
this.body.unshift(newSnakeElement);
Далее опишем проверку на нахождение яблока в змейке:
if (newSnakeElement.x == this.game.apple.pos.x && newSnakeElement.y == this.game.apple.pos.y) {
	// increase score
	this.game.score++;

	// check for win
	var isWin = this.addElement();
	if (isWin) {
		this.game.apple.remove();
		this.game.setStatus(this.game.STATUS.GAMEWIN);
	} else {
		// new apple
		this.game.apple.create();
	}
}
И если яблоко съедено, то увеличиваем счёт и добавляем новый элемент к змейке. Так же, если функция addElement возвратит true, то заканчиваем игру.
Полный код функции обновления змейки выглядит следующим образом:
Snake.prototype.update = function() {
	var newSnakeElement = {
		x: this.body[0].x,
		y: this.body[0].y
	};

	// update position
	if (this.isRoute('UP')) {
		newSnakeElement.y -= 1;
	} else if (this.isRoute('DOWN')) {
		newSnakeElement.y += 1;
	} else if (this.isRoute('LEFT')) {
		newSnakeElement.x -= 1;
	} else if (this.isRoute('RIGHT')) {
		newSnakeElement.x += 1;
	}

	// if on itself
	for (var i = 0; i < this.getSize() - 1; i++) {
		if (newSnakeElement.x == this.body[i].x && newSnakeElement.y == this.body[i].y) {
			this.game.setStatus(this.game.STATUS.GAMEOVER);
			return;
		}
	}

	// if outside scene
	var isOutsideX = newSnakeElement.x < 0 || newSnakeElement.x > this.game.sceneWidth - 1;
	var isOutsideY = newSnakeElement.y < 0 || newSnakeElement.y > this.game.sceneHeight - 1;

	if (isOutsideX || isOutsideY) {
		this.game.setStatus(this.game.STATUS.GAMEOVER);
		return;
	}

	// update array
	this.body.pop();
	this.body.unshift(newSnakeElement);

	// if on apple
	if (newSnakeElement.x == this.game.apple.pos.x && newSnakeElement.y == this.game.apple.pos.y) {
		// increase score
		this.game.score++;

		// check for win
		var isWin = this.addElement();
		if (isWin) {
			this.game.apple.remove();
			this.game.setStatus(this.game.STATUS.GAMEWIN);
		} else {
			// new apple
			this.game.apple.create();
		}
	}

	return 0;
}
Рендеринг змейки🔗︎
Змейка отрисовывается следующим образом:
Snake.prototype.render = function() {
	for (var i = this.getSize() - 1; i != -1; i--) {
		if (i == 0) {
			this.game.context.fillStyle = this.game.snakeHeadColor;
		} else {
			this.game.context.fillStyle = this.game.snakeColor;
		}
		this.game.context.fillRect(this.body[i].x * this.game.cellSize + 1, this.body[i].y * this.game.cellSize + 1, this.game.cellSize - 2, this.game.cellSize - 2);
	}
}
Голова змейки (нулевой элемент), рисуется в особом цвете.
Итог🔗︎
Полный код client/snake.js выглядит следующим образом:
function Snake(game) {
	// get data from game
	this.game = game;

	// route const
	this.ROUTE = {
		UP: 2,
		DOWN: 0,
		LEFT: 1,
		RIGHT: 3
	};

	// snake body
	var defaultPosX = Math.ceil(this.game.sceneWidth / 2);
	var defaultPosY = Math.ceil(this.game.sceneHeight / 2);

	this.body = [
		{x: defaultPosX, y: defaultPosY - 1},
		{x: defaultPosX, y: defaultPosY},
		{x: defaultPosX, y: defaultPosY + 1}
	];

	// set route
	this.setRoute('UP');
}

Snake.prototype.update = function() {
	var newSnakeElement = {
		x: this.body[0].x,
		y: this.body[0].y
	};

	// update position
	if (this.isRoute('UP')) {
		newSnakeElement.y -= 1;
	} else if (this.isRoute('DOWN')) {
		newSnakeElement.y += 1;
	} else if (this.isRoute('LEFT')) {
		newSnakeElement.x -= 1;
	} else if (this.isRoute('RIGHT')) {
		newSnakeElement.x += 1;
	}

	// if on itself
	for (var i = 0; i < this.getSize() - 1; i++) {
		if (newSnakeElement.x == this.body[i].x && newSnakeElement.y == this.body[i].y) {
			this.game.setStatus(this.game.STATUS.GAMEOVER);
			return;
		}
	}

	// if outside scene
	var isOutsideX = newSnakeElement.x < 0 || newSnakeElement.x > this.game.sceneWidth - 1;
	var isOutsideY = newSnakeElement.y < 0 || newSnakeElement.y > this.game.sceneHeight - 1;

	if (isOutsideX || isOutsideY) {
		this.game.setStatus(this.game.STATUS.GAMEOVER);
		return;
	}

	// update array
	this.body.pop();
	this.body.unshift(newSnakeElement);

	// if on apple
	if (newSnakeElement.x == this.game.apple.pos.x && newSnakeElement.y == this.game.apple.pos.y) {
		// increase score
		this.game.score++;

		// check for win
		var isWin = this.addElement();
		if (isWin) {
			this.game.apple.remove();
			this.game.setStatus(this.game.STATUS.GAMEWIN);
		} else {
			// new apple
			this.game.apple.create();
		}
	}

	return 0;
}

Snake.prototype.render = function() {
	for (var i = this.getSize() - 1; i != -1; i--) {
		if (i == 0) {
			this.game.context.fillStyle = this.game.snakeHeadColor;
		} else {
			this.game.context.fillStyle = this.game.snakeColor;
		}
		this.game.context.fillRect(this.body[i].x * this.game.cellSize + 1, this.body[i].y * this.game.cellSize + 1, this.game.cellSize - 2, this.game.cellSize - 2);
	}
}

Snake.prototype.addElement = function() {
	// get place to adding
	var last_index = this.body.length - 1;

	var newSnakeElement = {
		x: this.body[last_index].x,
		y: this.body[last_index].y
	};

	var x_diff = this.body[last_index].x - this.body[last_index - 1].x;
	var y_diff = this.body[last_index].y - this.body[last_index - 1].y;

	if (x_diff > 0) {
		newSnakeElement.x += 1;
	} else if (x_diff < 0) {
		newSnakeElement.x -= 1;
	} else if (y_diff > 0) {
		newSnakeElement.y += 1;
	} else if (y_diff < 0) {
		newSnakeElement.y -= 1;
	}

	// push in array
	this.body.push(newSnakeElement);

	// check on win
	if (this.getSize() == this.game.sceneWidth * this.game.sceneHeight) {
		return true;
	}

	return false;
}

Snake.prototype.getSize = function() {
	return this.body.length;
}

Snake.prototype.setRoute = function(value) {
	this.route = this.ROUTE[value];
}

Snake.prototype.isRoute = function(value) {
	return this.route == this.ROUTE[value];
}
Заключение🔗︎
В данной статье вы могли узнать ещё один способ создания змейки. Я выбрал именно такую архитектуру исходного кода потому, что она мне показалось максимально удобной. Такая структура не вызовет трудностей при попытке расширить проект.